
Let’s be real — taking your car to a professional wash every week can get pricey fast. But here’s the thing: with the right approach, you can give your car that same showroom sparkle right at home. Doing it yourself not only saves money but also lets you bond with your ride a little. So, if you’ve been Googling DIY car wash tips, you’ve landed in the right place.
Getting Ready for Your DIY Car Wash
Before diving in, gather your gear. You’ll need two buckets (one for soapy water, one for rinsing), a high-quality car shampoo, microfiber wash mitts, and drying towels. Try not to grab your old dish soap — it strips the protective wax and dulls your paint. Trust me, you don’t want that.
Also, pick the right spot. Avoid direct sunlight since it makes the water dry too fast, leaving annoying water spots. Early morning or late afternoon is perfect for your car wash ritual.
Start with a Thorough Rinse
Here’s the deal: before you even touch your car with a mitt, give it a solid rinse from top to bottom. This removes loose dirt and debris that could scratch your paint during washing. If you’ve got a pressure washer, great — just don’t get too close. The goal is to loosen grime, not blast off your paint job.
You’d be surprised how many scratches come from skipping this simple step. A quick rinse sets the stage for a smoother, safer wash.
The Two-Bucket Method (Your Car’s Best Friend)
You’ve probably heard this one before, but it’s worth repeating — the two-bucket method is a game-changer. One bucket holds your soapy water, and the other is just clean rinse water. Every time you wash a section of your car, dunk the mitt in the rinse bucket before reloading it with soap.
This keeps dirt and grit out of your wash water, reducing swirl marks. It might sound like a small detail, but trust me, it’s what separates a true DIY pro from a beginner.
Wash Top to Bottom
When it comes to DIY car wash tips, this one’s golden — always start from the top and work your way down. The upper parts of your car (roof, windows, hood) are cleaner than the lower sections. Washing top-down prevents dirt from lower areas from smearing back onto clean paint.
Break your wash into sections — roof, hood, sides, then bumpers and wheels. Rinse each area as you go so soap doesn’t dry on the surface.
And let’s not forget the wheels — they deserve special attention. Use a separate mitt or brush just for them, because brake dust is full of tiny metal particles that can wreck your paint if spread around.
Don’t Forget the Details
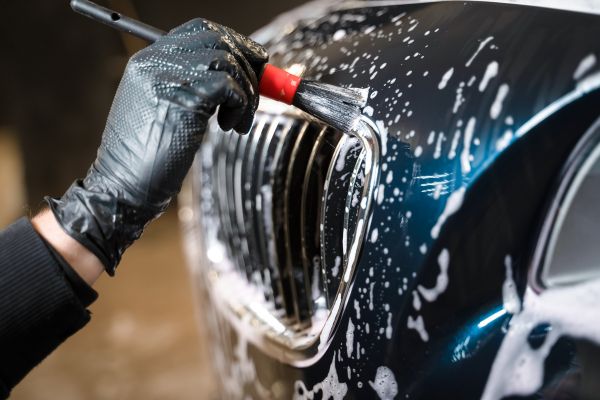
Pay attention to those often-overlooked areas — door jambs, mirrors, and under the wiper blades. They collect grime that can ruin your car’s look if ignored. Use a small detailing brush or an old toothbrush to get into tight spots.
And hey, while you’re at it, pop the trunk and give the edges a quick wipe. It’s those subtle touches that make your DIY car wash feel professional.
Rinse Again, Then Dry Right
Once you’ve scrubbed every inch, rinse the car one last time. Make sure to flush out all the soap, especially around emblems and crevices. Leaving residue can lead to dull spots or streaks once it dries.
Now, here’s where many people go wrong — they let the car air dry. Don’t. Water spots will ruin your hard work. Instead, use soft microfiber drying towels or a drying chamois. Gently blot and drag, rather than wipe aggressively. You’ll be amazed how clean and streak-free it looks.
Add That Final Touch — Wax or Sealant
If you really want to go from “nice” to “wow,” finish with a layer of wax or sealant. It’s not just about shine — it protects your paint from UV rays, bird droppings, and road grime.
Apply in small circular motions with an applicator pad, then buff off with a clean microfiber cloth. A good wax job can make water bead right off your car, and honestly, there’s something satisfying about that.
Clean the Interior, Too
Sure, this article is about DIY car wash tips, but come on — a sparkling exterior with a messy interior? Not the vibe. Quickly vacuum your seats, wipe down the dashboard with a mild cleaner, and freshen up the mats.
You’ll feel the difference every time you get behind the wheel. A clean car just drives better, right?
Bonus: Maintain Between Washes
You don’t have to do a full wash every week. A quick rinse or a waterless wash spray can keep dust at bay. Also, remember to clean bird droppings or bug splatter immediately — those can eat into your paint if left too long.
Keep a microfiber cloth and detailing spray in your trunk for quick touch-ups. Little habits like these keep your car looking sharp all the time.
Common Mistakes to Avoid
Let’s be honest, we’ve all made a few rookie mistakes while washing our cars. Using dish soap? Big no. Washing in the sun? Recipe for water spots. Using one dirty bucket? You’re just spreading the grime around.
Avoid abrasive brushes or old towels — they’ll scratch your paint faster than you think. And don’t forget to clean your microfiber cloths regularly. A dirty towel can undo all your careful work.
Wrapping It Up
There you go — the ultimate guide to DIY car wash tips that’ll make your car gleam like it just rolled off the lot. Washing your car at home isn’t just about saving money; it’s about taking pride in your ride. With the right tools, a little patience, and these practical tricks, you can keep your car looking brand-new all year long.
Next weekend, skip the drive-thru car wash, roll up your sleeves, and do it yourself. You’ll not only get better results but also enjoy the process — because let’s be real, there’s something pretty satisfying about seeing that final shine and knowing you did it.